
By Tom Murphy VII - Copyright © 1998
When you work in a job where you are constantly using computers for long enough, you develop a certain anxious feeling which can pretty much only be cured by beating the hell out of an old computer or two.
However, since this can be extremely frustrating and nerve-wracking if done incorrectly, I am providing for fellow techies and interested persons an illustrated step-by-step guide for Satisfying Computer Destruction.
This page has been visited about  times since 5 September 1996.
Perhaps the most satisfying of all bits of the computer to break is the keyboard. Keyboards have lots of moving parts which are spring loaded (the keys!) and which pop of relatively easily. There are many fun things to do with keyboards.
Activity 1: Keyboard & power drill.
Affix a wide paddle-type drillbit to the drill. The bit which I use is
a round metal disc from the innards of a SyQuest disc, though a regular
paddle drillbit works much better. (See Fig 1.1)
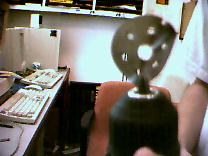
The drill should be a reasonably powerful electric hand drill. The bigger the drill, the more spectacular the results. Also, since the drill tends to drive itself, one which can be reliably held in one hand works the best.
Fig 1.1
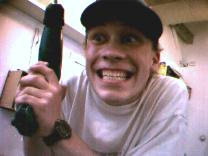
Once the drillbit is properly attached, the trigger should be pulled several times while making menacing evil faces (See Fig 1.2). This is done to intimidate the keyboard and fellow employees and to add to the overall effect. Evil faces may vary.
Fig 1.2
Wearing proper safety equipment, the drill should then be inserted in the keys and the trigger pulled. For the maximum effect, move the drill around smoothly but rapidly (See Fig 1.3 through Fig 1.6).
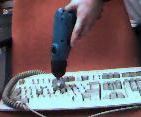 | 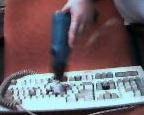 | 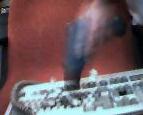 | 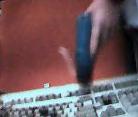 |
| Fig 1.3 | Fig 1.4 | Fig 1.5 | Fig 1.6 |
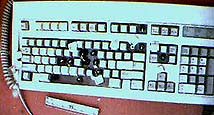
The estranged keys are useful for many things, and should be saved. The destroyed keyboard (See Fig 1.7) should also be saved.
Fig 1.7
Activity 2: Mano a diskette
3.5" computer disks are inexpensive, easy to find, and fun
to break. Everyone should have a few old rotten diskettes (or even new
AOL disks) handy near their computer for convenient stress-relief.
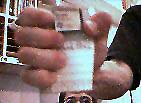
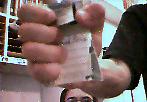
To crush the disk, simply grip it in one hand (the hand you use to write usually works best) as shown in Fig 2.1, and squeeze.
Fig 2.1
 | 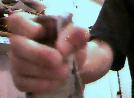 | 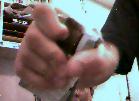 |
| Fig 2.2 | Fig 2.3 | Fig 2.4 |
I find that the best time to crush a disk is right after it has failed while trying to copy important files from home to work. Pop it out of the drive, crush it in your hand, and you will feel slightly better.
The broken disks are entirely useless, and they can be discarded. Do NOT put them in the disk drive. Or, at least not your disk drive.
Okay, so your monitor smokes and buzzes when you turn it on, there's no way you're going to get the important piece of image editing done for work tomorrow without it, but you've got a hammer and some free time...
Activity 3: Monitor + Hammer = Good Clean Fun!
This one can actually be dangerous and bad if you are unsafe about it, so be careful.
|
Here is the apparatus you'll need (see figure 3.1):
|
|
The first thing you should do is score the glass so that it breaks more
predictably. This is done with a glass cutting tool (see figure 3.2).
Here's a good pattern to do on the glass:
 Figure 3.3 |
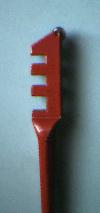 Figure 3.2 |
The next step, obviously, is to take the monitor outside or somewhere where broken glass on the ground is not a problem, and then break it with the hammer. I have videos of this, and I will put some stills up here soon, but for now you will just have to imagine.
Here's what the broken monitor looks like:
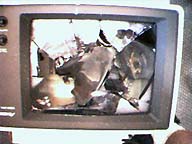
And here are the insides:
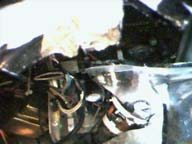 Figure 3.4 | 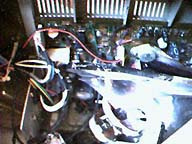 Figure 3.5 |
Activity 4: Hard drive defragmentation, etc.
|
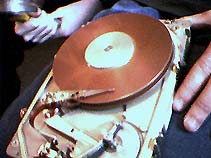
The hard drive is not deceptive in its nomenclature at all. They are hard. Hard to open, hard to drive (perhaps impossible to drive), and the parts inside are hard too. But, hard drives are fun. The platters are great to put your fingerprints all over and then throw like frisbees. Older hard drives have lots of large platters. Newer ones are smaller. Most hard drives carry a warning label as seen in figure 4.1, threatening dire things if you play with the drive. These should be ignored. Better yet, they should be blatantly violated, perhaps by drilling straight through the warning label or cracking it open and then reassembling the broken label and mounting it on a plaque to show everyone how Tough and Unabashed you are. |
Figure 4.1: Product warranty is void if the cover of the drive is removed or if the force on the drive exceeds 7 Gs. (Or something like that.) |
Here we see the drive, opened up using the
screwdriver with the appropriate shape (this one was star-shaped). The screws can
also be drilled out, but that is less elegant. There is also the ominous
claw-hammer looming in the background...
Figure 4.2
|
This is a low-level calibration of the drive, done with the hammer from figure 4.2. Note that the unreliable areas of the drive surface which were marked as "bad sectors". Also note that the drive is stubbornly resistant to calibration. |
Figure 4.3 |
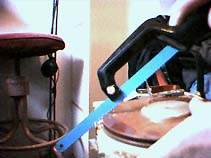
Figure 4.4 shows partitioning of the
drive using an ordinary hacksaw. Partitioning in this manner is advantageous
over fdisk because it allows partitioning of individual platters and is
independent of operating system. You also get to make cute designs.
Figure 4.4
|
The platters can be removed with the same screwdriver as before (or by drilling down the axle -- clamp the platters down so they don't spin with it), and are the best part of the hard drive. The remaining hardware can be discarded (drive electronics are not so fun to break since they are usually surface-mount). The platters are heavy and substantial and fly through the air pretty well. They also are remarkably good at violently breaking the skulls of other people and setting off car alarms, so be careful where you throw them. Figure 4.5 shows a pristine platter straight off the drive. |
Figure 4.5 |
Activity 5: Simulation of various climates on printed circuits
It is a well-known fact that extreme weather conditions can damage electronic equipment. In this activity we will simulate -- for purely scientific reasons, of course -- the effects of extreme temperatures on printed circuit boards.
|
We will first be testing the effects of hot temperatures. This is done using a pocket blow-torch, which can be purchased at Radio Shack. Securing the printed circuit and lighting the blowtorch, we then proceed to catch it on fire. Note: the figure shown at right (figure 5.1) is the incorrect method. This is because the circuit board will take a long time to catch on fire, and when it does it will be rather unspectacular and smell extremely bad. |
INCORRECT Figure 5.1 |
|
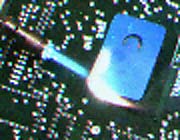
CORRECT Figure 5.2 |
Shown in figure 5.2 is the proper method. Seeking a flammable plastic component mounted on the circuitboard, fire can be achieved much more rapidly. It smells just as bad, however.
Figure 5.3 |
|
Figure 5.4 |
Shown at left in figure 5.4 is the burned component. |
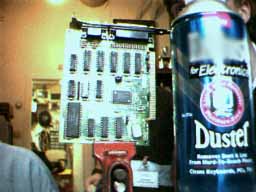 Figure 5.5 |
For the simulation of cold climates, a can of compressed electronic duster (of a type which does not damage the ozone layer!) is used. This can be seen in figure 5.5, with the label obscured to avoid lawsuits. |
|
Figure 5.6 shows how to use the duster properly. By holding the can upside-down, the contents remain liquified as they leave the nozzle! And very, very cold! |
 Figure 5.6 |
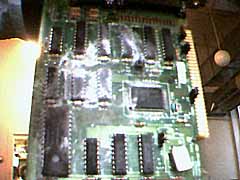 Figure 5.7 |
The circuitboard, frozen, is shown in figure 5.7. |
|
Whoa, slow down! You may think that this would be a great time to strike the printed circuit with a hammer and shatter it into little bits, but it won't work! Unfortunately, the cold is just not cold enough. |
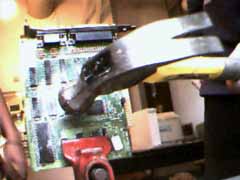 NO Figure 5.8 |

Snoot.org is a new website I made -- if you liked Breaking Your Computer, check it out, you'll like this too!
 This page was This page wasGeek Site Of The Day on 2.3.97! |
You used to be able to read the little article in the Washington Post (February '97) about this page, but they seem to remove them after a month! |
 Gist's Hilarious Site Of The Day on March 3 (Three Day!) 1997! Gist's Hilarious Site Of The Day on March 3 (Three Day!) 1997!
|
 Net Junkie's Pick Of The Day (Ho, ho, ho) on 11 March 1997! Net Junkie's Pick Of The Day (Ho, ho, ho) on 11 March 1997!
|
 Seven Wonders' Humor and Unusual site of the week - 17 March 1997! Seven Wonders' Humor and Unusual site of the week - 17 March 1997!
|
USA Today Hot site! |
 JKLaFemme's Pearls of The Web JKLaFemme's Pearls of The Web
|
![]() More fun and excitement (or something like that)! Back to Tom's Page!
More fun and excitement (or something like that)! Back to Tom's Page!
Appendix 1: Intimidating Pre-Destruction Remarks
In order to ensure maximum computer-breakage excitement, it is mandatory that intimidating pre-destruction remarks be made. Examples include (some are not appropriate for all activities):

Appendix 2: Getting Caught
Practicing computer-destruction too frequently can endanger yourself
and others, as well as your job. Here are some things to do if you get
caught:

Is breaking computers illegal? Here is an excerpt from the Connecticut General Statutes (53a-251 - "Computer Crime"):
Provision (f) seems to claim that destruction of any computer equipment, no matter who owns it, is a violation of this law and constitutes Computer Crime! So everybody, watch your backs! *wink* (Unless, of course, you are a girl. Note the very sexist "...when he violates any of these...".)